

Bear-y Berry Good: A Fun Guide to Growing Corn in Australia

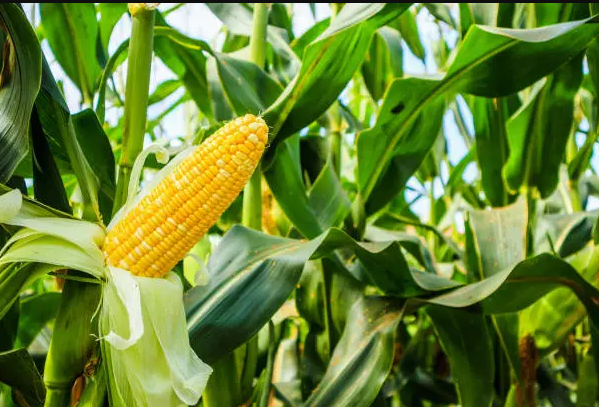
Growing corn in Australia can be a truly rewarding experience, filled with the joy of nurturing your plants and harvesting delicious crops. With its bright yellow ears and lush green leaves, corn (Zea mays) not only adds beauty to your garden but also offers a bounty of sweet flavours and nutritious benefits. Here’s an in-depth, cheerful guide to help you successfully cultivate corn in your garden or farm while adhering to Australian standards.
Step 1: Choose the Right Variety
1. Select Appropriate Varieties: The key to a successful corn harvest lies in choosing the right variety suited to your climate and intended use. Here are some delightful options that thrive under the sun in Australia:
- Sweet Corn (Zea mays subsp. saccharata): Bursting with sugary goodness, sweet corn is a garden favourite! Varieties like ‘Golden Bantam’ and ‘Sugar Buns’ are known for their tender, juicy kernels that are perfect for summer barbecues. ‘Golden Bantam’ is a heritage variety that offers rich flavour, while ‘Sugar Buns’ is celebrated for its sweetness and disease resistance.
- Field Corn (Zea mays indurata): Primarily used for livestock feed, field corn is robust and high-yielding. Varieties such as ‘Pioneer’ are popular among farmers for their adaptability and productivity. If you’re looking to support your local livestock or produce silage, this is a reliable choice.
- Flint Corn (Zea mays indurata): Known for its vibrant colours and hard kernels, Flint corn is both functional and decorative. Varieties like ‘Glass Gem’ are captivating to the eye, with kernels that ripple in shades of blue, pink, and purple. Not only can you use it for decorative purposes, but it also makes fantastic cornmeal and polenta!
As you embark on your corn-growing journey, consider your climate, soil type, and how you’ll use your harvest. This joyful process will ensure you select the best variety for your needs, leading to a flourishing garden filled with character and flavour.
Stay tuned for the following steps, where we’ll dive into site selection, soil preparation, planting techniques, and beyond!🌽✨
Step 2: Understand the Climate
1. Best Planting Times: Corn thrives in warm weather, and the timing of planting can significantly affect its growth and yield. In Australia, the optimal planting window typically falls between late spring and early summer, specifically from October to December.
- Northern Australia: In regions like Queensland, particularly in the north, the warm, subtropical climate allows for early planting as soon as the cold weather subsides. Farmers may begin sowing corn as early as mid-October.
- Central and Southern Australia: In areas like New South Wales and Victoria, late spring planting in November is often ideal. Here, farmers wait until the risk of frost has passed and soil temperatures have warmed sufficiently. For example, in regions like the Riverina, farmers typically plant corn in November, using the warm seasonal conditions to their advantage.
- Western Australia: The timing can vary slightly in Western Australia due to its Mediterranean climate. Farmers in regions like the South West may start planting corn in late October to early November, aligning with their unique seasonal patterns.
2. Monitor Temperature: Corn prefers soil temperatures between 16°C and 30°C for optimal germination and growth. Monitoring temperature is crucial, as it directly affects seed germination and overall plant health.
- Frost Risk: In southern regions, where late spring frosts can occur, farmers need to ensure that soil temperatures have consistently risen above 16°C before planting. Areas like Tasmania, for instance, may experience unexpected cool spells; thus, monitoring local forecasts is vital.
- Irrigation Needs: In drier regions, such as the Northern Territory, irrigation practices play a critical role in maintaining adequate soil temperatures. Farmers often use irrigation to help warm the soil and promote optimal conditions for planting.
By understanding the regional climate differences across Australia, farmers can strategically plan their corn planting to align with the best seasonal conditions, thereby maximising their yield potential.
Step 3: Soil Preparation
1. Select a Site: Choosing the right location for planting corn is crucial for a successful yield. Ideally, select a sunny spot that receives at least 6-8 hours of direct sunlight daily. This is particularly important because corn is a warm-season crop that thrives in full sun. Within a permaculture framework, consider the surrounding ecosystem—choose a site that not only benefits your corn but also supports beneficial relationships with nearby plants, insects, and animals. Companion planting can enhance the health of your corn crop, so think about what other plants could coexist beneficially in your garden.
2. Soil Testing: Before planting, it’s essential to conduct a thorough soil test. This will help you understand the pH levels and nutrient composition of your soil. Corn grows best in soil with a pH between 5.8 and 7.0. Regular testing allows you to make informed decisions about amendments needed to achieve optimal growing conditions. In a permaculture context, good soil health is foundational; it fosters diverse microorganisms and improves plant resilience. Our blogs provide detailed guides on how to conduct soil tests and interpret your results effectively.
3. Soil Amendment: Enriching your soil with organic matter, such as compost or well-rotted manure, is a key strategy in permaculture. Organic matter improves soil structure, enhances moisture retention, and provides essential nutrients. Tilling can aerate the soil, promoting root growth and health, but it should be done carefully to avoid disturbing the soil microbiome. In permaculture, the goal is to create a balanced ecosystem where soil quality continuously improves over time. We offer extensive guides on various amendments—what to use, how to incorporate them, and how they benefit specific crops, ensuring you can tailor your approach to your unique garden.
4. Drainage: Ensuring good drainage is vital in corn cultivation. Excess water can lead to waterlogged conditions that are detrimental to corn roots, risking root rot and other diseases. In a permaculture design, evaluating the natural drainage patterns of your landscape can inform how you position your garden beds. Implementing swales or raised beds can improve drainage and reduce erosion. Our blogs feature insights on creating effective drainage solutions and building resilient garden beds that align with permaculture principles.
By applying these principles of soil preparation, you not only set the stage for a thriving corn crop but also enhance your overall garden ecosystem. If you're interested in diving deeper into any specific aspect of soil preparation or other gardening topics, we have comprehensive guides available in our blogs that cover everything from organic soil amendments to enhancing biodiversity in your garden.
Step 4: Planting Seeds in Australia
1. Spacing
- Depth and Distance: When planting seeds, ensure they are placed about 2.5 cm deep. It’s crucial to maintain a distance of 20-30 cm between each seed. This spacing allows enough room for the plants to grow without competing for resources such as water and nutrients. Additionally, ensure that the rows are spaced 75-100 cm apart. This layout facilitates air circulation, sunlight exposure, and easier access for maintenance tasks such as weeding and harvesting.
2. Seed Quality
- Choosing Certified Seeds: It’s essential to use high-quality seeds from certified Australian organic seed distributors. Certified seeds not only improve the likelihood of germination but also help combat diseases. Look for suppliers that meet the Australian Standard for Organic and Biodynamic Produce (AS 6000). This standard ensures that the seeds have been produced according to organic farming practices without synthetic pesticides or fertilisers.
- Recommended Australian Organic Seed Distributors:
- The Seed Collection: They specialise in heirloom and organic seeds, offering a wide variety suitable for Australian climates.
- Digger’s Club: An excellent source for organic and heirloom seeds, Digger’s offers a large catalogue that includes traditional plants and new varieties.
- Seeds N Beyond: Focused on permaculture and organic gardening, Green Harvest provides a selection of seeds that are suited to Australian growing conditions.
- Eden Seeds: This distributor specialises in organic and non-hybrid seeds, which are ideal for sustainable gardening.
- Australian Organic Seeds: A dedicated source for authentic organic seeds that meet Australian organic standards.
3. Watering
Initial Watering
After planting, the initial watering phase is crucial for seed germination. It is important to water lightly to ensure that the seeds are adequately moistened without saturating the soil. Creating puddles or overly soggy conditions can lead to several issues, such as seed rot or the development of fungal diseases that can compromise the health of your plants. The goal is to create a balanced moisture environment that encourages germination while avoiding excess water that could harm the seeds.
Soil Moisture Management
Monitoring soil moisture levels is essential, particularly during the critical germination period. Seedlings are vulnerable, and maintaining the right moisture balance is key to their survival. While the soil surface may appear dry, be mindful of the moisture content at the planting depth, as this is where the vital root establishment begins.
Utilising techniques such as mulching can be incredibly effective in retaining moisture in the soil. In many of Australia's climates, during the hotter months, evaporation rates can be high, leading to increased water requirements for your plants. Organic mulches, like straw or wood chips, not only help prevent moisture loss but also suppress weeds and improve soil health over time.
Wet and Dry Back Periods
Understanding the concepts of wet and dry back periods can further enhance your watering strategy. A wet back period refers to the time immediately following watering when the soil is saturated and the moisture content is high. It is during this time that plants uptake much-needed water and nutrients. Following this, it is crucial to allow for a dry back period, where the soil moisture reduces to promote root growth and prevent diseases. This cycle encourages deep root systems and healthier plants overall.
As we dive deeper into these concepts, our upcoming blogs will explore various watering techniques, recommended practices based on Australian standards, and tips for managing soil moisture effectively throughout the different seasons. By implementing these practices, you can foster a thriving environment for your plants, adapted to the unique challenges of the Australian climate. Keep an eye on our blogs for more in-depth discussions on moisture management and optimal watering schedules tailored to your specific gardening needs.
4. Additional Considerations
- Climate Adaptability: Research the particular climate conditions of your region (e.g., temperature, rainfall patterns) to choose seeds that will thrive. Different areas of Australia vary widely in climate, which affects the success of various plants.
- Soil Preparation: Prior to planting, ensure the soil is well-prepared. This may involve tilling, removing weeds, and adding organic matter such as compost to improve soil structure and nutrient content.
- Pest and Disease Management: Familiarize yourself with common pests and diseases in your region. Employ organic practices such as companion planting, crop rotation, and the introduction of beneficial insects to minimise pest issues without resorting to chemical methods.
By following these guidelines and utilising trusted Australian organic seed distributors, you’ll establish a fruitful garden that complies with organic standards while contributing to sustainable practices in Australian agriculture. Happy gardening!
Step 5: Care During Growth
Successful corn cultivation requires a systematic approach, particularly when considering the specific environmental conditions and standards in Australia. Here's an expanded guide on caring for corn during its growth phase, along with an introduction to the Three Sisters planting method.
1. Watering Schedule
Corn is a thirsty crop; it requires approximately 25-50 mm of water per week to thrive. This can be achieved through rainfall or irrigation practices. Here are some crucial points to keep in mind:
- Irrigation Techniques: Utilize drip irrigation or soaker hoses to provide water directly to the soil. This method minimises evaporation loss and ensures that water penetrates deeply into the root zone, fostering stronger root development.
- Timing: The best times to water are early in the morning or late in the afternoon to avoid water loss through evaporation. Avoid watering during hot, sunny days or windy conditions.
- Soil Moisture Monitoring: Regularly check the moisture level in the soil. Using a moisture meter can help you determine when irrigation is necessary.
- Drought Resistance: Drought-stricken corn can lead to reduced yields. Implement mulching techniques to retain moisture and improve soil structure.
2. Weed Control
Weeds compete with corn for nutrients, light, and water, so managing their growth is crucial:
- Manual Weeding: Regularly inspect the field and manually remove weeds before they set seeds. This is particularly effective in the early growth stages.
- Mulching: Apply organic mulch (such as straw or grass clippings) around corn plants to suppress weed growth. Mulching also helps retain soil moisture and enriches the soil as it decomposes.
- Herbicides: When necessary, use post-emergent herbicides that are appropriate for use in Australian agriculture. Follow local regulations and guidelines for chemical use to minimise environmental impact.
3. Fertilisation
Corn is a nutrient-demanding crop, especially during the early growth stages:
- Soil Testing: Conduct a soil test before planting to determine nutrient availability and pH levels. This will help you tailor your fertilisation program to meet the specific needs of your soil.
- Balanced Fertilizers: Use a balanced fertiliser high in nitrogen (such as a N-P-K ratio of 10-20-10) when the plants are approximately 30 cm tall. Nitrogen promotes vigorous leaf growth, which is essential for photosynthesis and ear development.
- Additional Applications: Based on plant growth observations and soil tests, consider applying side-dressings of nitrogen fertiliser approximately 4-6 weeks after planting or as needed throughout the growing season.
4. Pest and Disease Management
Caring for crops includes diligent pest and disease monitoring:
- Pest Identification: Keep an eye out for common corn pests such as corn earworms, aphids, and armyworms. Regular scouting helps in early detection, allowing for quick action to mitigate infestations.
- Integrated Pest Management (IPM): Employ an IPM approach, which involves a combination of strategies:
- Beneficial Insects: Encourage natural predators like ladybugs and lacewings, which help control aphid populations.
- Organic Pesticides: In the case of pest outbreaks, consider using organic pesticides that comply with Australian standards, such as neem oil or insecticidal soaps.
- Crop Rotation: Implement crop rotation practices to reduce the buildup of pests and diseases in the soil.
The Three Sisters Planting Method
The Three Sisters is a traditional planting technique used by Indigenous Australians and other cultures worldwide. This technique involves growing corn, beans, and squash together, which can enhance growth and yield while promoting sustainability.
1. Benefits of the Three Sisters
- Companion Planting: Each plant in this trio serves a purpose that supports the other plants. Corn provides a tall structure for beans to climb, which in turn fixes nitrogen in the soil, providing a nutrient boost for corn and squash.
- Optimized Space: The vertical growth of corn maximises sunlight for the other plants while allowing the sprawling nature of squash to cover the ground, reducing weed pressure and moisture loss.
- Biodiversity: Planting multiple species helps reduce the likelihood of disease spread and pest infestations, creating a healthier ecosystem in the garden.
2. Planting Techniques
- Timing: Plant the corn seeds first, allowing them to germinate and grow to about 15 cm tall before introducing beans and squash.
- Row Layout: Plant the corn in a circle or mound. Once the corn seeds have sprouted, plant bean seeds around the base of each corn stalk, followed by planting squash seeds at the edges or between rows.
- Care Requirements: The care for the Three Sisters method aligns with general corn cultivation practices, including consistent watering and monitoring for pests and diseases. However, the nutrient cycling benefits from the beans can reduce the need for additional fertiliser.
By integrating these practices into your corn cultivation, you can enhance growth, yield, and overall sustainability, ensuring a successful harvest. Remember to adapt your practices according to local conditions and always follow Australian agricultural guidelines for the best results.
Step 6: Pollination
1. Encourage Pollination: Corn is a unique crop in that it relies on wind for pollination. In Australia, where breezy conditions can vary significantly, planting your corn in blocks rather than long rows can significantly enhance your corn's pollination success! This increased density allows the wind to carry pollen more effectively from one tassel to another, leading to fuller, juicier ears of corn. Imagine your little corn plants growing merrily as nature does its work, ensuring each ear is brimming with sweet, delicious kernels!
2. Hand Pollination: In smaller gardens where wind may not be a reliable helper, you can give Mother Nature a little nudge by hand-pollinating your corn. It’s a simple and gentle process that can make a big difference in your harvest! Just take a moment to gently shake the tassels, watching as fine yellow pollen falls like fairy dust over your plants. You might even find it delightful to gather the family for some “corn-shaking” fun—a perfect way to spend quality time in the garden! Not only does this help ensure each cob is fertilised, but it will also foster a sense of joy as you engage with the plants, nurturing them into fruitful adulthood.
Step 7: Harvesting
1. Timing: The excitement of harvesting sweet corn is one of the great joys for any gardener! Generally, you can expect to reap your rewards about 70-100 days after planting, depending on the specific variety of corn you’ve chosen. Keep an eye on those lovely ears; they’re ready to be harvested when the kernels appear plump and are filled with a milky substance when you bite into them—this is a true sign that they’ve reached their peak of flavor! Enjoy this anticipation—you’re just a few days away from tasting the fruits of your labour.
2. Harvest Method: Once your corn is ready, it’s time to reach for the stars—or, rather, for those delightful ears! The best way to harvest is to simply twist and gently pull the ears from the stalk. If you find it easier, don’t hesitate to use scissors to cut them off at the base. Remember to smile as you do this; every ear you pick is a testament to your gardening efforts and the beauty of nature.
3. Storage: After harvesting, the ultimate joy is enjoying your fresh sweet corn right away! It’s the best way to savour that divine sweetness straight from the garden. However, if you can’t eat it all at once, don’t worry! Corn is a versatile vegetable. You can store it in the refrigerator for a few days, but for longer preservation, consider freezing or canning your corn. Just imagine the pleasure of enjoying your homegrown sweetness in winter—there’s nothing quite like it! Whether you’re planning a summer barbecue or cozying up for a midwinter feast, you’ll have that blissful taste of summer right at your fingertips.
Growing sweet corn can be a joyful experience filled with anticipation, laughter, and ultimately, delicious rewards. So, dig in, enjoy the process, and celebrate every step along the way!
Step 8: Post-Harvest Care in Permaculture and No-Till Systems
1. Cleaning Up
After harvesting, it’s crucial to clean up your garden beds thoroughly. This involves:
- Removing Plant Debris: Collect and dispose of any leftover plant material, such as stalks and leaves, to minimise the risk of pests and diseases. Instead of discarding this organic matter, consider using it for composting or creating a mulch layer. This returns nutrients to the soil and promotes a healthier ecosystem.
- Weed Management: While cleaning, take the opportunity to identify and manage any persistent weeds. Pulling them out by the roots can help reduce their chances of survival and reemergence next season.
2. Incorporating Permaculture Principles
Rather than treating your garden as a short-term project, embed permaculture practices to create an ecosystem that thrives year after year.
- Layering: Use the concept of layering to establish a rich ecological environment. After harvest, apply a layer of mulch (straw, wood chips, or leaves) to suppress weeds, retain moisture, and enhance soil structure. This mulch will also break down over time, adding organic matter back into the soil.
- Biological Diversity: Introduce cover crops or green manures such as clover or vetch to increase soil fertility, improve soil structure, and provide habitat for beneficial organisms. These crops can fix nitrogen in the soil and prevent erosion during the off-season.
- Polyculture: Plan your next planting around a polyculture approach. Incorporating various plants can lead to greater yields, pest resistance, and improved soil health compared to monoculture systems.
3. Implementing No-Till Practices
The no-till method is essential for maintaining soil health and reducing disturbances to the soil structure.
- Minimize Soil Disturbance: Instead of tilling, try to work the soil as little as possible. Use hand tools or a broadfork to aerate the soil if needed, but avoid turning it over. This preserves the soil's natural structure and its microscopic ecosystems.
- Direct Seeding: When you're ready to plant again, consider using a seeding method that doesn’t disturb existing soil. Drill seeds into the undisturbed soil or use a technique like "slot seeding." This allows you to plant while keeping the nutrient-rich topsoil intact.
- Layering Organic Matter: Before replanting, add organic matter like compost or decomposed leaves directly on top of your existing soil as a top dressing. This not only nourishes the plants but inoculates the soil with beneficial microorganisms, improving its overall health.
4. Crop Rotation Strategies
Crop rotation plays a fundamental role in maintaining soil health and preventing pest cycles.
- Plan Your Rotation: Develop a planting strategy that rotates crops based on family types. For instance, follow a brassica with a legume, then a leafy green, and finally a root crop. This helps prevent soil nutrient depletion and reduces the chances of pest infestations specific to certain crops.
- Companion Planting: Within the rotation, consider companion planting strategies—certain plants can repel pests or enhance the growth of others. For example, planting marigolds among your vegetables can deter nematodes and other pests.
5. Observing and Adapting
Finally, take the time to observe your garden and its outcomes through the seasons. Maintain a garden journal to document what worked and what didn’t. This will not only help you make informed decisions for future planting but also continuously tailor your practices to improve your permaculture and no-till approaches.
By integrating these practices into your post-harvest care, you can cultivate a resilient garden that not only supports current crops but also strengthens soil health and biodiversity for future growing seasons.
Step 9: Continuous Learning
1. Stay Informed: Join our Discord server, connect with us on social media, and share experiences with friends to get advice specific to your area.
2. Experiment: Try different varieties and techniques to find what works best for your conditions.
By following these steps and paying attention to the specific conditions of your local environment, you can successfully grow corn in Australia. Happy gardening!
Much Love, Ya Burr 🌿🍓
